If you enjoy this how-to guide and decide to grab one of the items listed, please consider clicking through one of my links before you buy. I earn a small commission at no cost to you, which helps support this site and keep these informative guides coming. Thanks!
With lots of budget tube mic preamps and channel strips cropping up on the market, owning a quality piece of equipment for adding tube warmth and saturation to your home studio recordings is more attainable than ever. These budget models, however, tend to come with cheaper preamp tubes. Though these budget tubes are serviceable, they simply don’t compare to the character of higher-quality tubes. Today we’re going to learn how to replace mic preamp tubes, and also decide whether it’s a worthwhile endeavor for your particular unit.
Why Should I Consider Replacing Mic Preamp Tubes?
When solid-state electronics replaced the vacuum tube half a century ago, their small footprint, reliability, and far lower distortion were eagerly welcomed for most applications. There was a downside, however. Vacuum tubes, when used for amplification, impart a subtle and pleasing distortion to the signal that solid-state electronics simply don’t have. Hoping to capture some of that magic, modern hardware manufacturers have created hybrid solid-state and tube preamplifiers that are the best of both worlds – the reliability of solid state, with tubes in the preamplifier stage to impart that same saturation.
As manufacturers compete for your hardware dollar, one way they’ve found to save money and make their tube mic preamps and channel strips more affordable is to equip them with cheap, no-name Chinese tubes. Though they are still better than solid-state in a lot of ways, these budget tubes don’t really compare to name brand alternatives. That said, there are two main benefits to upgrading your stock preamp tubes to better models:
- Higher output level
- More pleasing sonic character and saturation
If you have a higher-end tube mic preamp – in the thousands of dollars – odds are it came with quality tubes. If, however, your mic preamp cost in the hundreds of dollars, odds are very strong that it came with cheaper tubes and could benefit from tube replacement. If after reading this you feel that your tube preamp could benefit from better tubes, read on for step-by-step instructions.
Parts List
To create this guide, I replaced the tubes on my ART Pro Channel II tube preamp channel strip and documented the process. ART makes budget gear for home studio applications, and though I love my Pro Channel, I’ve read that I would love it even more if I swapped out the tubes in the mic preamp section. At about $350 for the unit, it’s definitely on the lower end of what’s available on the market, and comes stock with no-name Chinese tubes.
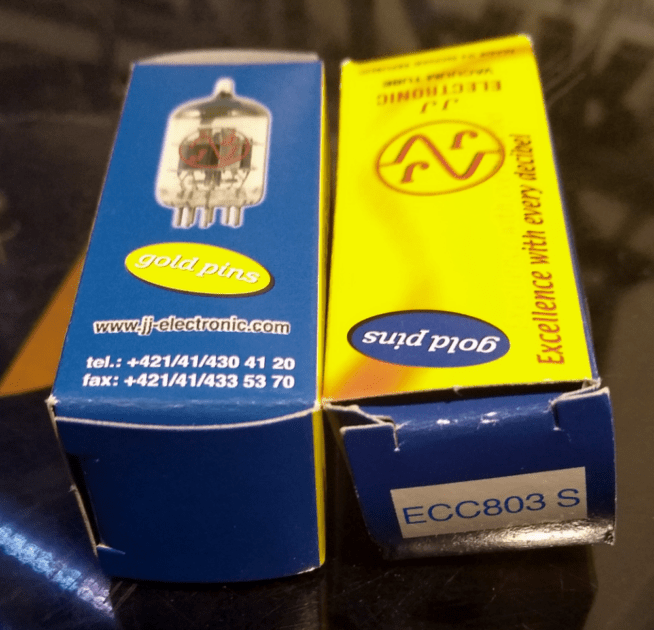
Before you remove the first screw on your preamp, you’ll need a set of replacement tubes. There are dozens of brands on the market, each imparting their own character. Since they are relatively affordable, you may even decide to buy more than one set and try them out. My Pro Channel uses two tubes in the mic preamplifier, an 12AT7 and a 12AX7. After doing a bit of research, I found that JJ Electronic ECC81 and ECC803S tubes made in Slovak Republic are popular replacements for the Pro Channel.
Confused as to why I would replace a 12AT7 with an ECC81? Because there are different standards for tubes in the US and Europe, there are different names for the exact same types of tube. Also, there are slightly different tube models that can be used in the same socket, which extends the tonal possibilities. If you’re also modding a Pro Channel and want to follow this mod exactly, here are the tubes I got:
- JJ Electronic ECC803 / 12AX7 Long Plate Gold Pin Vacuum Tube
- JJ Electronic ECC81 / 12AT7 Gold Pin Vacuum Tube
I went with a long plate ECC803S tube instead of an ECC83 tube, which is the direct replacement for a 12AX7, because they are known for their slightly higher gain and warmer midrange sound, perfect for vocals and guitar. The total cost was about $50.
Once your tubes have arrived, make sure to leave them sit in your house for a few hours to acclimate to room temperature before you install them, especially if you live in a cold environment. Now that your warm tubes are ready, let’s go step-by-step through the installation process!
(Disclaimer: Opening your mic preamp’s chassis and/or changing the stock components will very likely invalidate your manufacturer’s warranty. Please check with the manufacturer of your particular preamp unit and understand the consequences before making the decision to upgrade your tubes. Also, working on electronic gear can cause electric shock or even death if not done properly, so any modifications you choose to do to your equipment are done at your own risk. Those not familiar with working on electronics should have this work done by a professional. Home Studio Today is not liable for any damage or injury that may occur.)
Step 1: Locate the chassis screws on your mic preamp
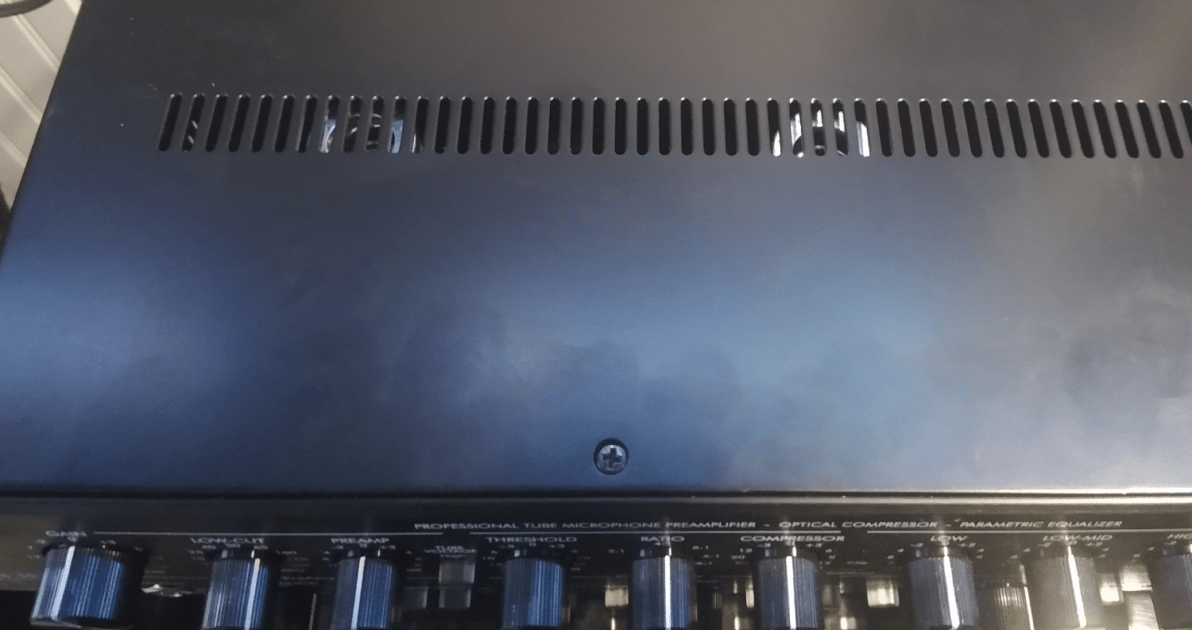
Unplug your mic preamp or channel strip, remove it from the rack or other mounting surface, and set it on an open table free of obstruction. If the unit was in use, wait at least half an hour for it to cool down before disassembly. You’ll want to make sure that you have plenty of elbow room and that you’re seated or standing with your feet firmly planted to avoid electrostatic discharge. Locate the chassis screws on the top, sides, back, and/or bottom of the unit. Typically, there will be vent holes on tube equipment for the purpose of heat dissipation, which should make it easy to figure out which panel needs to be removed to expose the tubes. Don’t just start taking screws out, look at the metal covers and determine which ones hold the chassis cover on. (When in doubt, consult the service manual for your unit.) Carefully unscrew all the screws and place them in a cup or magnetic screw holder for easy reassembly later. I prefer to get them started with a hand screwdriver to avoid stripping the heads.
Step 2: Remove the outer cover to expose components
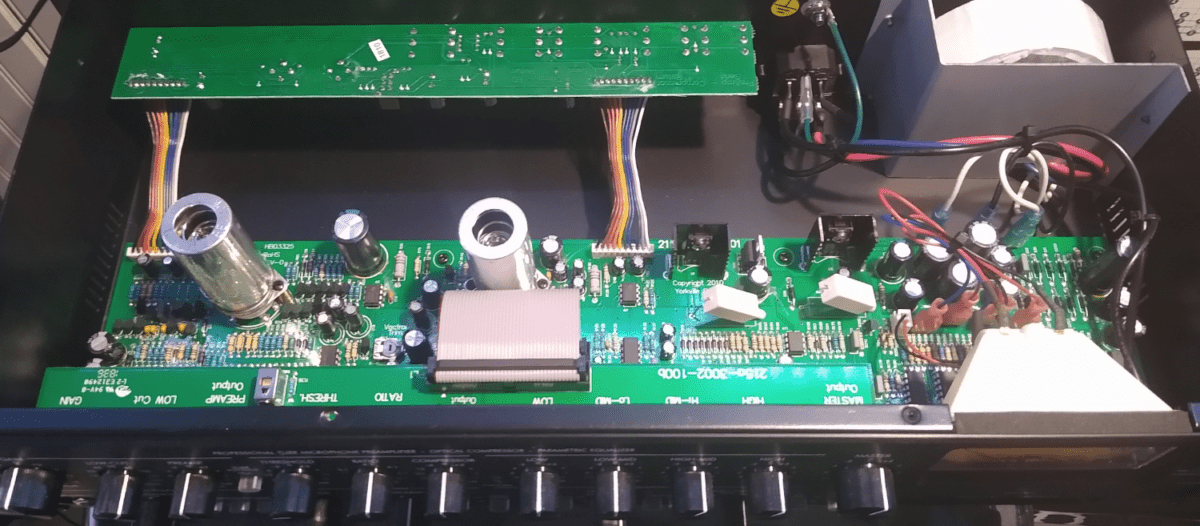
As you’re removing screws, you can gently pull on the chassis to unseat it as you go. Once the last screw is taken out, you should be able to pull the cover off easily, or with just a little force if necessary. Be careful not to bend the cover. Once the cover is free, set it aside.
Step 3: Locate preamp tube sockets
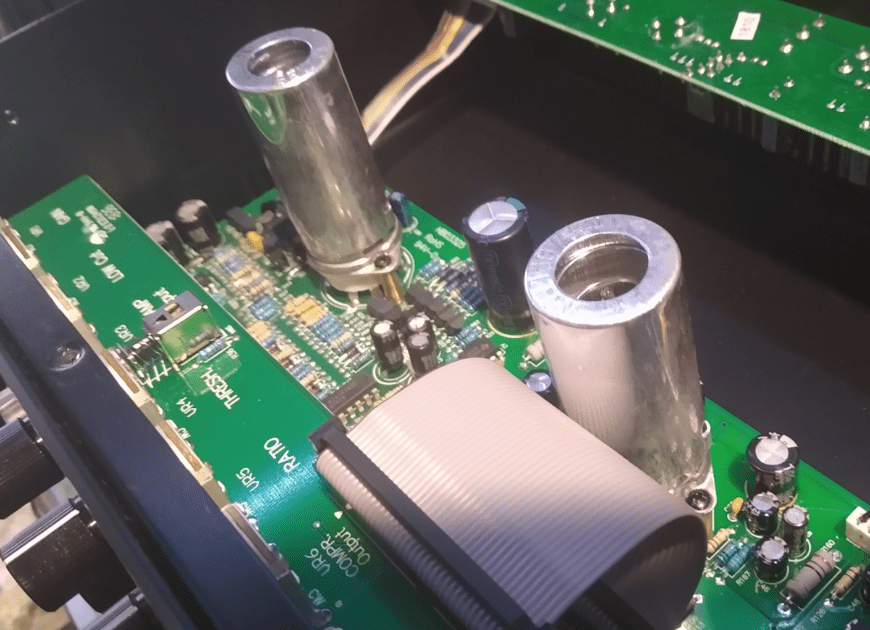
Look inside the chassis for the tube sockets. On most units this will be a short step, but on more crowded housings it may be a little more difficult. Typically, tube sockets are white porcelain or plastic, similar to a light bulb holder in color, and will have metal clips or tube shields holding the tubes in place.
IMPORTANT: Before you go any further, make sure you have grounded yourself on the chassis and you’re in a seated or standing position with your feet firmly planted to avoid electrostatic discharge. Touching electronic components without properly grounding yourself can cause an electric shock that can damage your unit.
Step 4: Remove any tube shields or clips
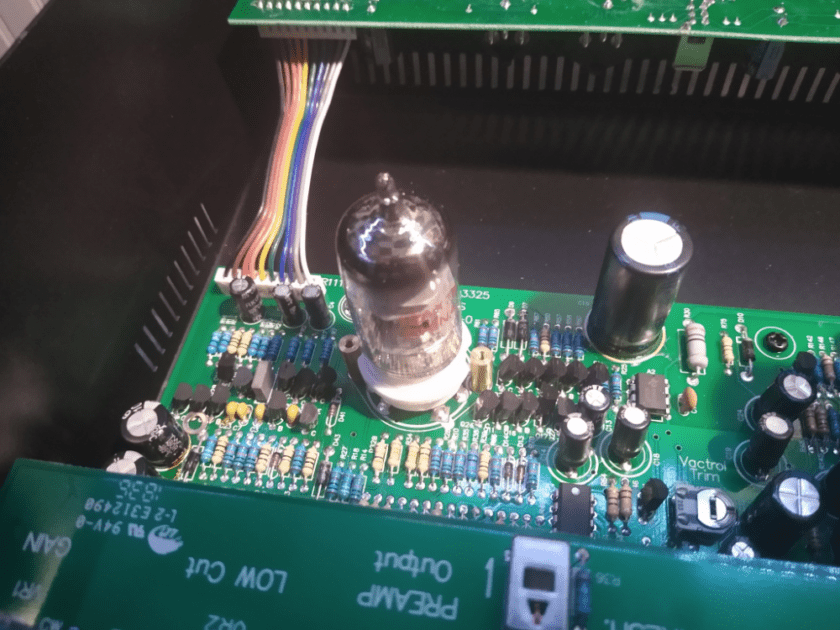
Once you’ve located the tubes, you can unclip them or remove the screws holding on their shields. If you drop any of the screws or washers, carefully lift the unit and gently turn it from side to side and upside down to get the errant hardware to fall out. DO NOT TOUCH ANY OF THE OTHER COMPONENTS WITH YOUR FINGERS. (Again, if you’re not confident that you can perform this upgrade safely, take your preamp to a qualified shop.)
Step 5: Carefully remove the old tube
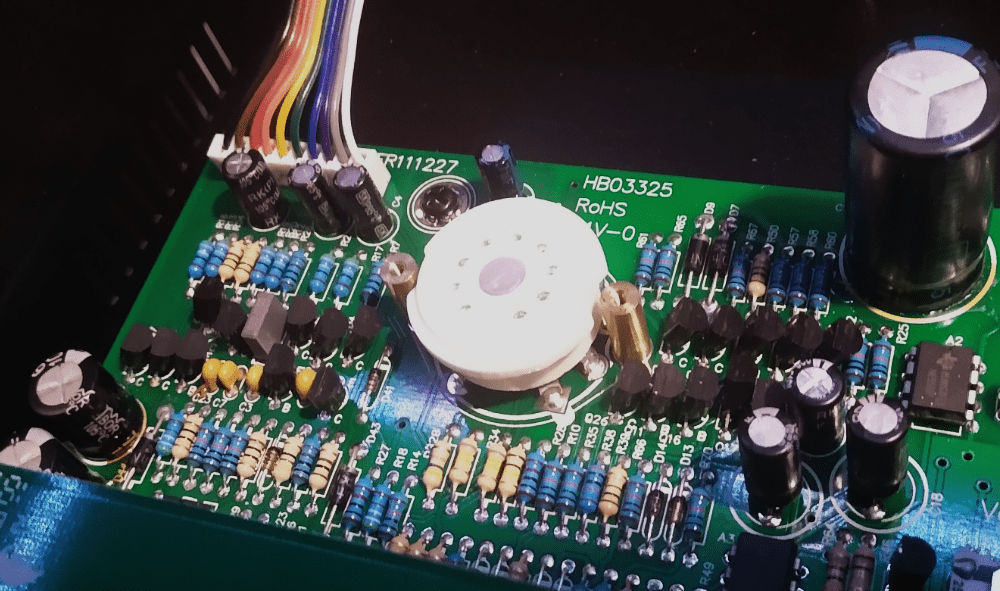
Removing the tube will take a bit of force. I prefer to take a cloth or paper towel and wrap it around the tube to prevent finger oils from getting on the tube, then gently pulling while rocking back and forth a few degrees to get the pins to unseat. You should feel the tube release from the socket after pulling it out about an eighth of an inch.
Step 6: Match the correct tube types
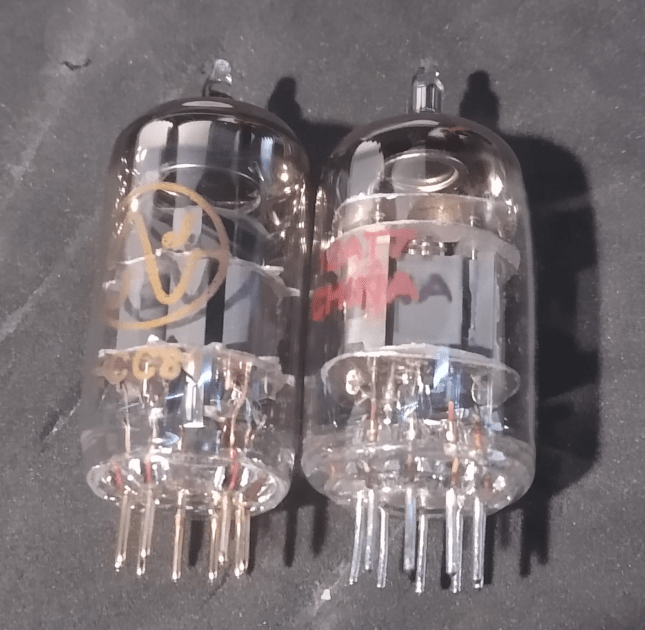
Once each tube is free, it’s time to match them up with the replacements. I find it best to remove and replace one tube at a time if I’m doing more than one kind to make sure I don’t mix them up. In the picture above are the new JJ ECC81 tube on the left, and the cheapo “China” 12AT7 tube on the right. Notice the gold pins and the overall nicer look of the electronics inside the tube.
Step 7: Install the new tubes
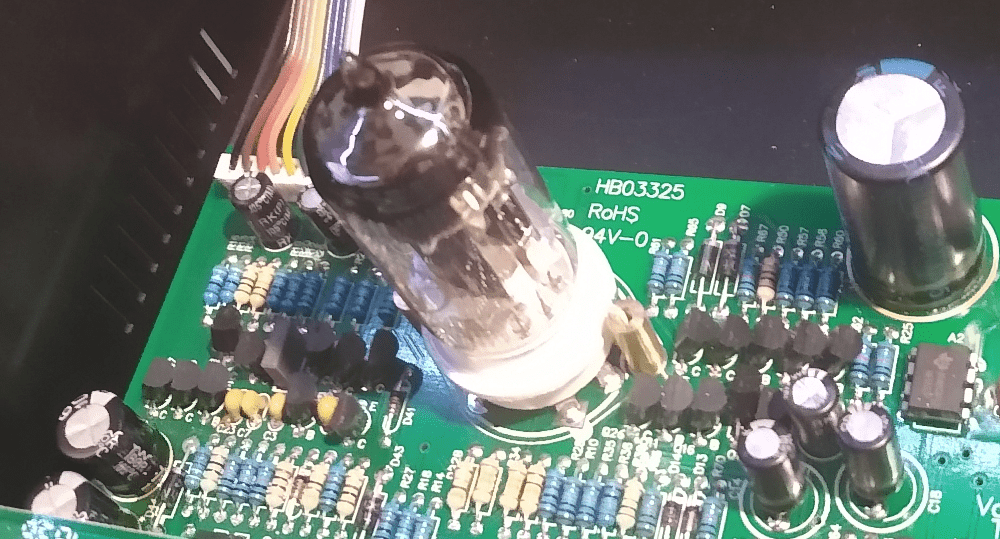
Now you can take your newly matched tube and insert it into the socket. It will take a bit of insertion force, but be careful to line up the pins correctly so you don’t bend or break them inadvertently. Again, I prefer to wrap the tube in a cloth or paper towel to keep finger oils off of it, which can increase the tube’s lifespan.
Step 8: Replace tube shields or clips and reassemble chassis
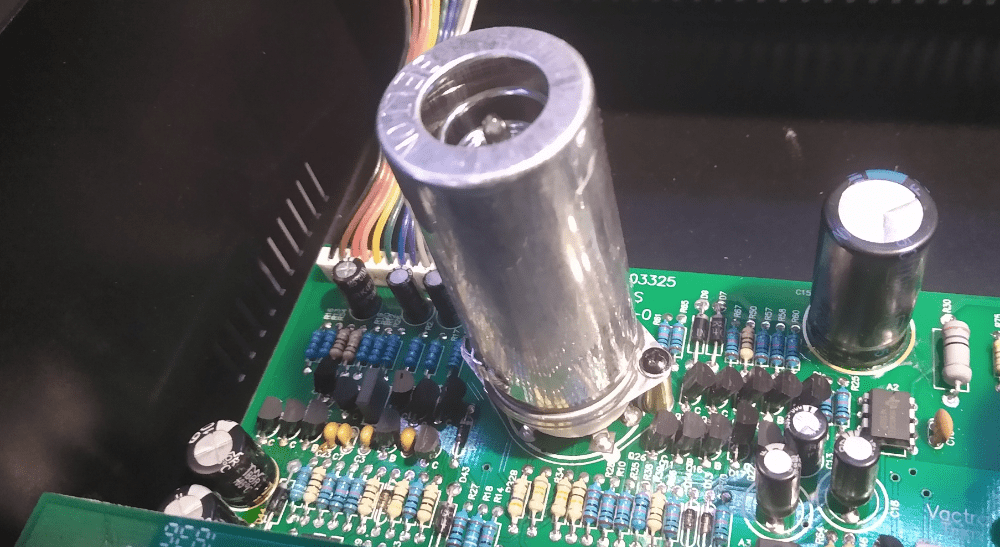
Once your tubes are seated, put the shields or clips back on exactly the way you found them, then put the cover back on the chassis and screw it back in. Be careful to line up the cover perfectly from all angles before cranking in the screws to avoid cross-threading. I find it best to start the screws with a hand screwdriver instead of a drill. That’s it, you’ve just upgraded your mic preamp tubes!
Hear It In Action
After all this expense and effort, was it worth it to replace my preamp tubes? The answer, to me, is a resounding ‘yes.’ To better help illustrate the difference, I made two sample recordings. Here is an acoustic guitar recorded using my ART Pro Channel II with an AKG P420 at the neck joint with no effects applied in my DAW save for a mastering limiter on the master to increase the output gain:
Next, here’s the exact same guitar, with the same mic, in the same room, using the exact same settings on the preamp dials and in the DAW, recorded just a few minutes apart. The only difference is that I replaced the preamp tubes and gave the unit about ten minutes to warm up:
Next, to showcase the difference in final output, I took the first sample with the old tubes and sweetened it with a console emulation (compressor and EQ) and a finely tuned notch EQ to pull out some of the string squeak:
Now here’s the second sample with the new tubes using the same plugins. I had to modify the gain and EQ a bit because of the difference in output and character.
How To Replace Mic Preamp Tubes – The Bottom Line
Overall I’m incredibly pleased with the upgrade, and I haven’t even burned in the tubes yet. I’m looking forward to many years of recording through this modded mic preamp, which after this upgrade is performing just as well as some that I’ve used at a much higher price point.
If you used this guide to upgrade the tubes on your preamp, we’d love to hear the results! Join us in our Home Studio Enthusiasts Facebook group and post a sample for us to hear and tell us all about how it went. We’d love to have you!

