If you enjoy this review and decide to grab the deal, please consider clicking through one of my links before you buy. I earn a small commission at no cost to you, which helps support this site and keep the reviews coming. Thanks!
“If my masters sound great at home, why don’t they sound good everywhere else?”
This is a question that nearly every home producer asks themselves at some point. Here’s the scenario: You spend days, weeks, or months putting together your track – something you’re really proud of – only to have it fall flat when you play it back somewhere else. The bass is overpowering or muddy, the highs are searing or harsh, or the mids are a tangled, crowded mess. Clearly something is wrong with your master, but no matter how much you tweak, you can’t seem to get it right.
If you’re experiencing this frustration, odds are strong that poor calibration is to blame. Your studio space, even if it’s acoustically treated, has an inherently imperfect sound signature that colors the sounds that you hear. Some surfaces have a tendency to trap or reflect certain frequencies, making what you hear in your room different than what is actually on your track. That’s where calibration comes in.
In a nutshell, calibration is the process of adjusting the audio output coming from your DAW to create as flat of a frequency response as possible. By carefully measuring your studio listening environment with a special microphone, you can make small EQ adjustments to compensate for variations in your room to help tune and flatten the frequency response of your monitors.
Today we’re going to take an in-depth look at an all-in-one calibration solution, Sonarworks Reference 4, compare it to the other calibration options available on the market, and decide if it’s worth the price.
(This article is a review of Reference 4 – for a tutorial, please see my article on How to Calibrate Your Studio Monitors with Sonarworks Reference 4 Studio.)
Looks
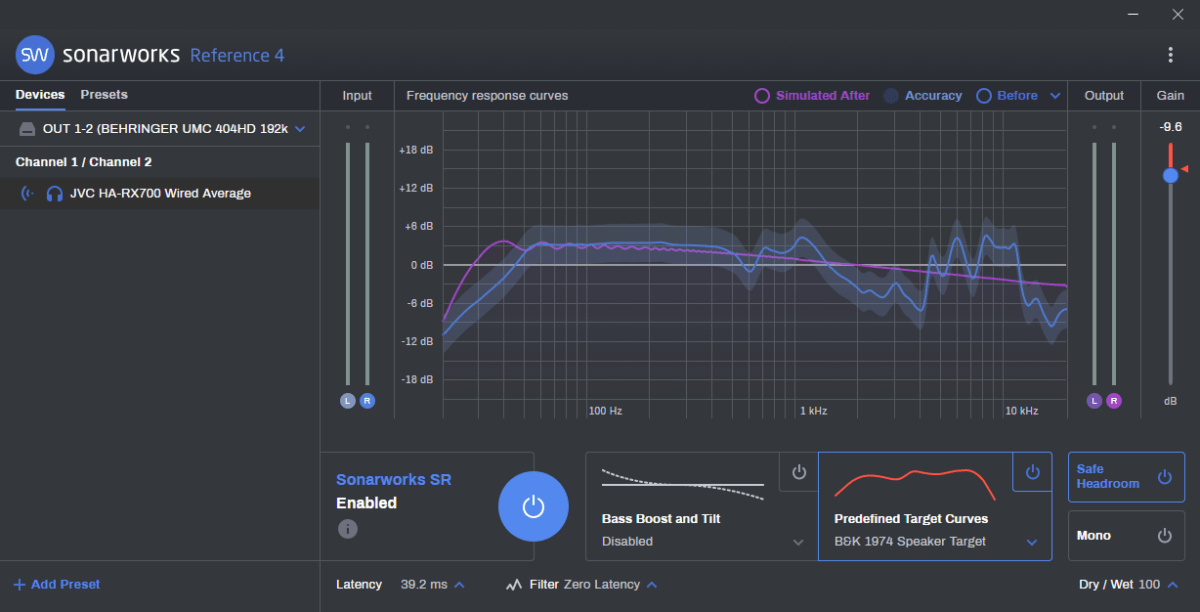
Sonarworks Reference 4 is available in two versions: Studio Edition and Headphone Edition. As you would imagine, Headphone Edition allows for headphone calibration, while Studio Edition includes both headphone and speaker calibration. There are three main components to Reference 4:
- Reference 4 Systemwide, which applies calibration profiles to all of the sounds coming from your system,
- Reference 4 DAW Plugin, which is inserted as the last effect on your master buss and applies calibration profiles to your DAW output only, and
- Reference 4 Measure, which is the room measurement wizard that builds custom speaker profiles and is only included in Studio Edition.
Each of the three applications has a clean, well-laid-out interface. On the far left of Reference 4 Systemwide and DAW Plugin are a device and preset loader, and on the far right is a master gain. Along the bottom are the main on and off switch, bass boost and tilt, and target curve selections. The step-by-step profile creation wizard in Reference 4 Measure includes tons of illustrations and visual feedback to help new users create custom monitor profiles.

Features
Reference 4 Systemwide and DAW Plugin have nearly identical interfaces and operate in exactly the same way, just in a different scope. Let’s check out the controls of each.
(Reference 4 Measure is a wizard and therefore has far too many screens and controls to go through in the context of this review, but if you’d like to see an extensive look at the Measure wizard in use, check out my article on How to Calibrate Your Studio Monitors with Sonarworks Reference 4 Studio.)
Devices and Presets
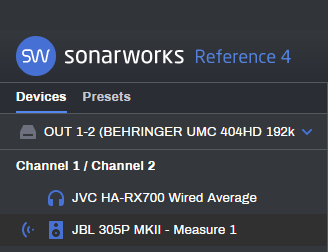
Once you’ve created profiles for your monitors and headphones, this menu allows you to choose the active calibration curve. The two tabs allow you to list the available options by either Device or by Preset. Clicking one of the options instantly changes the output calibration.
Power, Bass Boost and Tilt, Target Curves, Safe Headroom and Mono

The big blue Power button turns Sonarworks Reference 4 on or off, and Mono toggles stereo and mono operation. It was particularly fascinating to turn the power on and off repeatedly and listen for the subtle differences in equalization. The Safe Headroom control applies a fixed headroom ceiling to the gain control, ensuring a low level of output distortion based on the calibration profile.
The Bass Boost and Tilt allow you to cut or boost low-frequency gain by up to 6dB, and also to tilt the entire 20Hz-20kHz frequency range by up to 6db as well. This is particularly useful for beefing up the sound coming out of your monitors or headphones when you’re just kicking back to some tunes and not mixing or mastering your tracks, and also for simulating the sound that may come out of other people’s stereos, as those are what the typical EQ controls do on most consumer stereos. The Predefined Target Curves take this a step farther by emulating home theater and movie theater target curves.
Gain and Meters
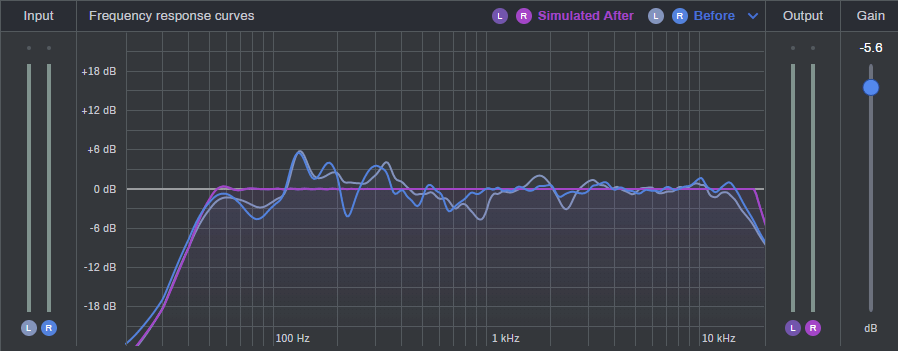
On either side of the frequency graph are input and output level meters, plus an output gain control. Though not a real-time graph, the frequency response graph is a nifty way to see exactly how the calibration profile is affecting the output. The graph has six options: Before, Calibration, Simulated After, Phase, Limits, and Target, plus left and right.

Usablity
This is where Sonarworks Reference 4 really earns its keep. Before making the decision to get Reference 4, I bought a measurement mic and downloaded Room EQ Wizard. (If you don’t have a room measurement mic, I recommend a Dayton EMM-6 or an EarthWorks M23.) To say that Room EQ Wizard is complicated is an understatement – it took me several hours just to figure out how to jumper my interface correctly and get through the first measurement, and to be honest, I’m still not 100% sure if I did it correctly. Then I went through several more hours of trial and error, adjusting EQ curves, and measuring again. After several days of this, I never really found a curve I was fully satisfied with.
Sonarworks Reference 4 Measure, on the other hand, walked me through the entire process of creating a calibration profile with step-by-step instructions and helpful illustrations, and I didn’t have to make any jumpered connections on my interface. In under half an hour from starting the download, my headphones and monitors were fully calibrated. If in the future I decide to hang different acoustic treatments, rearrange my studio, or buy new monitors or headphones, I know that I can load up Reference 4 Measure again and create an updated calibration profile in under 20 minutes.
What I noticed when I first loaded up my DAW after my first calibration with Sonarworks Reference 4 is how much I have been compensating for my room without knowing it. Looking at my room measurement graph and comparing it to the EQs I applied to my most recent tracks before calibration, there’s a direct correlation: I was boosting sub-bass and lower-mids while cutting mid-bass – exactly where my graph shows I was off. I’m happy that my ears were picking up the right frequencies to correct, but upset that my masters were less than perfect as a result.
The headphone calibration presets are also very good. I found my headphones on the list and enabled the profile in about ten seconds flat. The difference was astonishing; far less subtle than with monitors in my acoustically treated room. All in all, the usability of Sonarworks Reference 4 was what I was paying for, and I was not disappointed.

Hear it in Action
I’m not a big fan of disclaimers, but I feel that should preface these samples with a reminder that calibration varies from room to room and device to device. In my original draft of this review, I didn’t include samples at all for this reason. That said, upon further review, I think it’s important for you to hear the differences, both subtle and drastic, that Sonarworks Reference 4 can make in your signal path, even if these samples will inevitably be less-than-perfect in your particular playback environment.
So, without further ado, here is the dry reference track that will serve as our “before”:
Next, here’s the same track with the headphone EQ switched on. This is calibrated for a pair of JVC HA-RX700 budget studio headphones, and therefore will almost definitely sound worse if you’re on monitors or speakers, but possibly better if you’re using headphones and definitely better if you’re using that exact pair of cans. Either way, you can hear the huge shelved cut in the 40-600Hz range, and the boost in the 3-5kHz and 12kHz+ ranges. When I play this back on my headphones, the difference is brilliant and far flatter than I’ve ever experienced with those headphones:
Finally, here’s the same track again calibrated for my studio monitors in my acoustically-treated space. The difference from the flat sample is subtle, but you can hear a roughly 4dB boost in the 60-100Hz and 800-1000Hz ranges, a 6dB cut in the 120-150Hz range, and a shelved boost near 15kHz:
Sonarworks Reference 4 Review – The Bottom Line
To judge the value of a product, you have to look at its direct competition. For Sonarworks Reference 4 Studio Edition, the competition is Room EQ Wizard, a free piece of calibration software. How do you beat free? Simply put, by creating an easier-to-use product that saves time and effort. As mentioned above, I struggled with Room EQ Wizard for many hours – hours that could have easily been spent making music – whereas with Reference 4 I was calibrated in less time than it takes to get a pizza delivered.
For Sonarworks Headphone Edition, the only competition is Toneboosters Morphit, which does have Sonarworks beat in price for headphone-only applications, but the breadth of headphone profiles in Reference 4 is far superior. Overall it’s clear where the value is in Sonarworks Reference 4 – it’s in the time and headaches saved, which makes it worth every penny to a busy person like me.

Being ever a budget-conscious consumer, I first tried to go the inexpensive route with my studio calibration, but found myself disappointed and frustrated. As far as I’m concerned, Sonarworks Reference 4 doesn’t have any actual competition; The simplicity, accuracy, and the massive difference that Reference 4 has made in my masters with nearly zero effort expended is already well worth the cost. If you’re looking for an easy out-of-the-box solution for tuning your monitors and headphones, Sonarworks Reference 4 is the only real option.

The easiest solution for solving calibration issues inherent to the home studio environment. Simple, wizard-based interface and set-it-and-forget it operation.

